Here's how you can install KODI on Ubuntu from the official PPA by the XBMC team.
KODI is undoubtedly one of the most used used truly cross platform media center application with tons of features and addons.
The process is very simple, you just need to follow the steps below one by one. Assuming you have the basic knowledge of using the linux command line.
Contents
1. Add the Ubuntu KODI official PPA
There's 3 different PPA maintained by the XBMC team, stable, unstable and nightly. The stable PPA is used by most.
Before adding the PPA, just make sure that the add-apt-repository command is installed.
sudo apt-get install software-properties-common
To add the stable KODI Ubuntu PPA, first open up the terminal application, and run the command below. You can just copy-paste it.
sudo add-apt-repository ppa:team-xbmc/ppa
The unstable repository contains fairly usable KODI builds with latest features. Yet they may broke at any point without any reason.
If you want to use the unstable PPA for latest features, use the command below.
sudo add-apt-repository ppa:team-xbmc/unstable
Both of these commands commands above should run without any problem.
In case you're wondering, the nightly builds are only intended for developers to test and debug, so not suitable for everyday use.
2. Update the software repository and packages
Next you need to update the apt software repository, you can update it either from Ubuntu Software Center or from the command line.
sudo apt-get update
Here's more about how the apt command works, apt in details.
Next upgrade all the installed software packages to avoid any package conflict and shared library version mismatch.
sudo apt-get upgrade
3. Install KODI Ubuntu
To install KODI with apt you need to run the command below.
sudo apt-get install kodi
It will download KODI and all the dependencies required to install, now you're done.
Alternatively you can use the Ubuntu Software Center again to install KODI without running any commands.
4. Install necessary addons
We can extend KODI's usability much more by installing useful addons. In reality KODI is much like a media player application without them.
So, which addon and from where? There's some binary addons available from the PPA repository and there's hundreds of of them in the official KODI repository in ZIP format.
You can install the binary addons with apt and others from the KODI settings interface.
So, here's some useful binary add on, install them with apt.
sudo apt-get install kodi-pvr-mythtv kodi-pvr-octonet kodi-pvr-hdhomerun kodi-pvr-stalker kodi-pvr-filmon
Actually there's lot of binary addon, you should search them apt-cache command, and install your favorite.
apt-cache search kodi pvr
4. Running KODI on Ubuntu
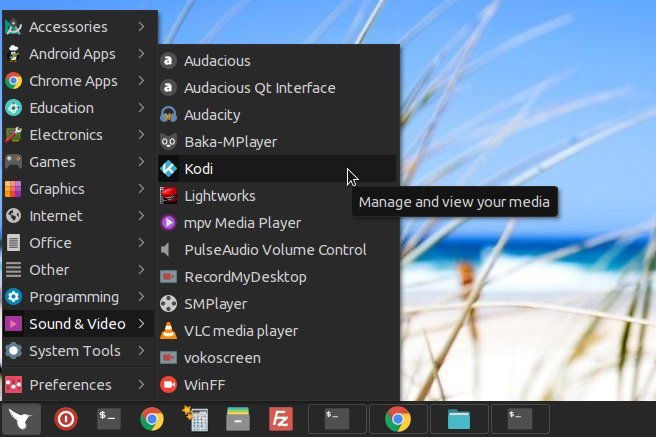
Now you can launch the KODI multimedia app from application launcher menu. In default Ubuntu, launch it from Unity dash.

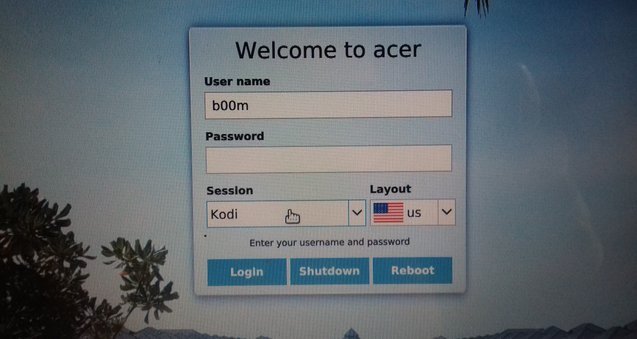
Alternatively you can launch it as a desktop session from your login screen, i.e. display manager. I'm using SDDM at this time, could be different on your system.
Uninstall KODI from Ubuntu
Actually there's no reason to uninstall KODI, it's not a very big software that uses huge amount of disk space. Anyway if you want to uninstall it, follow the instructions below.
First we need to remove KODI and all it's plugins installed with apt.
sudo apt-get purge kodi-* kodi
sudo apt-get autoremove --purge
Then remove the PPA, as we don't need the repository anymore.
sudo add-apt-repository -r ppa:team-xbmc/ppa
At last remove the .kodi directory to delete all user generated data and configurations.
rm -rf ~/.kodi/
These steps should be enough to remove KODI and it's other components completely.
Conclusion
As we know KODI is designed to work without a mouse, so the menus are quite navigable with a keyboard or remote. However a slightly demotivating fact about KODI is it doesn't look that great on small screens.
That's all how to install KODI ubuntu, I've tested it on Ubuntu 17.10 and 16.04.3 LTS.
Next I'll talk about some essential KODI addons and how to setup large external monitors for KODI, and sideload APK files to install KODI, stay tuned!
Leave a Reply