You may need to uninstall ubuntu completely from a dual boot system for various reasons.
If you were using Ubuntu regularly, then there may be some important files, it's wiser to take a backup of those files first.
So, here's how you can uninstall ubuntu dual boot without Windows installation USB or CD. It could be done in two ways(or 3, depending on your system), either from Ubuntu or from Windows.
It's rather easy on UEFI based systems, if Windows 10 was installed with UEFI compatibility, let's get started.
Contents
Uninstall Ubuntu step by step
To remove ubuntu dual boot you need to follow the steps below one by one. All these steps are done within the Windows 10 installation.
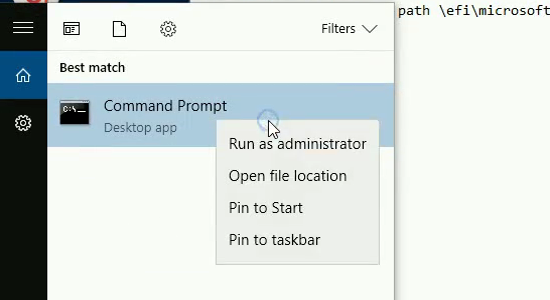
- First open up the command prompt as Administrator.

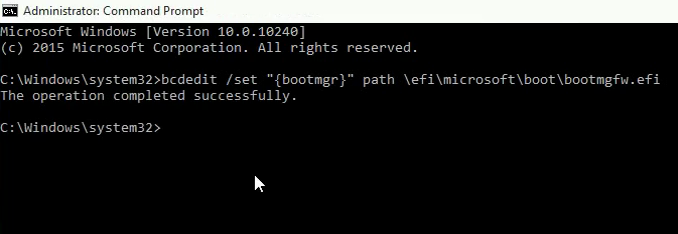
- Next set the correct EFI executable as default boot entry. For that, you need to run the exact command below. Alternative method here.
bcdedit /set "{bootmgr}" path \efi\microsoft\boot\bootmgfw.efi
- If the above command was successful, then reboot your PC to check if it's booting straight to Windows or not.
- If it's booting to windows normally, then it's time to delete the linux partitions and recover that free space.
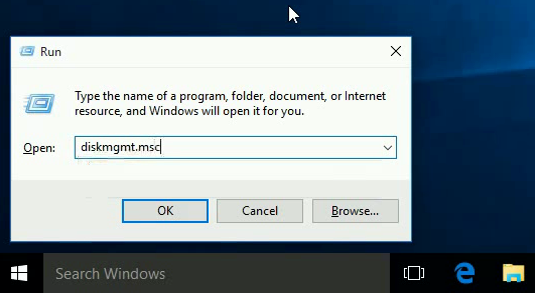
- To delete the linux partitions, Press the
Win+Rkey combo and type diskmgmt.msc to start Disk Management tool.
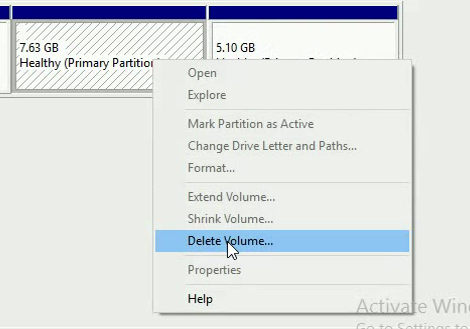
- Select the correct hard disk and identify the Ubuntu partitions.

- Now delete all the identified linux partitions. Select the correct partitions and right click on them, and hit the delete volume option.

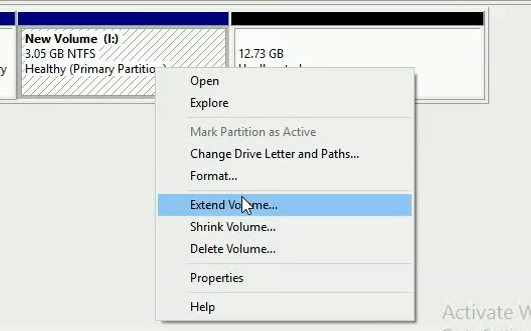
- Apparently you have two choice, either use this free space to extend an existing windows partition, or leave it to dual boot linux in future. But for now, I'll choose the first option.

- Extending an windows partition is fairly easy, assign all the free space to the extending volume.

Video of the same, warning - bad quality 😀 .
Alternative method to change boot order
As we're dealing with a UEFI system, we can change the UEFI boot order directly from the UEFI firmware setting, i.e. the BIOS settings. Of course for that, you've to enter your PC/laptop's BIOS settings while.
Tap or hold the BIOS setting key while restating your system, in my case it's F2 key. Which might be different on your system, like the Esc or Delete key.
Then go to the boot selection menu, again this could be different on your system, but you got the idea.
From there you can select the UEFI boot priority, select Windows Boot Manager as first priority.
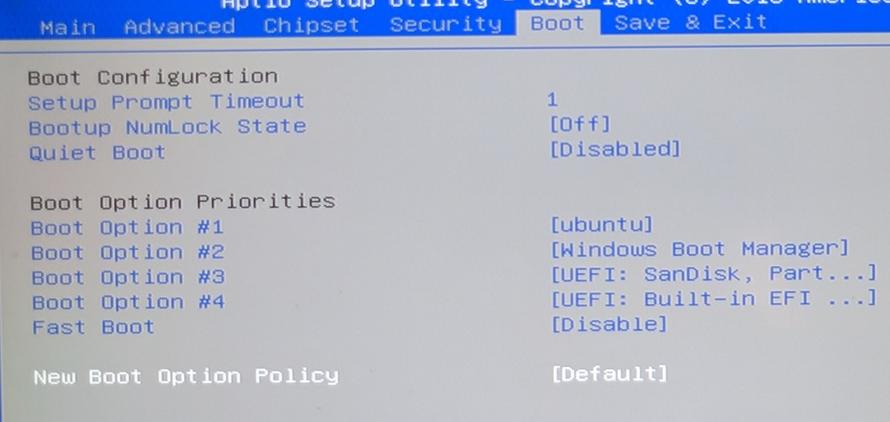
From there you can directly boot to Windows 10 without typing the bcdedit command.
Troubleshooting
Check the point 3 in the above list, if you're still booting to GRUB, then you may need to fix it within Ubuntu with efibootmgr command line tool.
I'm not going to very details, but what you've to do is change the UEFI boot order with efibootmgr command.
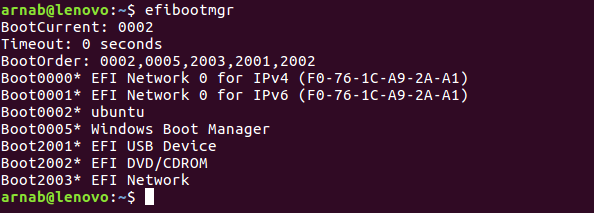
First check the default boot order with only the efibootmgr command.
Next you need to put widows first in the EFI boot entry, for that you need to run the command below on Ubuntu.
sudo efibootmgr -o 0005,0002,2003,2001,2002
Note: Your efi boot entries could be different, don't just copy paste the above command.
Uninstall ubuntu and GRUB: This step is totally optional, but required when you need to remove every part of linux, as the EFI system partition is untouched in this tutorial.
To remove ubuntu grub you need to mount that partition on Windows and remove the entire Ubuntu directory with windows commands. Alternatively you can use a linux live USB and mount the EFI system partition to remove the Ubuntu directory.
Conclusion
That's all about how to remove ubuntu from dual boot system, hope it's simple enough to understand. You can read more about windows boot manager here.
This exact same method could be used with any windows-linux dual boot system, not limited to Ubuntu only.
Have any suggestion or question? just leave a comment, also don't forget to share this tutorial with your friends.



Hi Arnab. I found your article useful, but I have slightly different situation. I was trying to install Ubuntu on UBS, from another live USB flash drive. I was stuck in the process error messages, went back and forth I made sure no sda was selected in any point, but it prompted to store swap or something else was warning for storing at sda (despite selecting sdc only). I went back, changed settings, repeated, this time was fine with sdc only, but it someone ended up making some changes to internal hard drive. Now instead of booting in windows only, it starts with GRUB. I had to restart and select F12 to change boot option. UEFI boot shows ubuntu and windows when nothing else connected. I don't know much about it or what happened, but I thought I could follow your suggestions to fix this. I do not have linux partition though, so not sure if rest of the steps are still applicable. Where is this GRUB stored actually? Any suggestions? Thanks.
On UEFI systems, GRUB related files are stored on two partitions.
The GRUB EFI executable is stored on a FAT32 partition, known as ESP, roughly around 100 to 500 MB.
And other GRUB related files are stored inside the root partition(
/) of the linux system. Most probably you've deleted it.Seems like you need to clean up the ESP partition.
Many thanks for this.
The command prompt entry did not work for me.
But using efibootmgr in Elementary did enable me eventually to do the bypass and delete.
One tip which some may find useful.
I couldn't get the boot order to change.
Not for want of trying.
So I just marked the 'Ubuntu' lines as inactive.
That was sufficient to obtain a Windows only bootup, carry out steps 5 to 8 above, and restart straight to Windows.
Yeahm, you're right, as Windows 10 is booting in UEFI mode, we just have to delete the Linux partitions.
But still the GRUB rescue mode may appear.